
01908 6998020845 899 4400 | 01908 699802Tel 01908 699802
Welding Stainless Steel
Welding Stainless Steel is no big deal. As long as you use a suitable welding rod or wire for the type of Stainless Steel you intend welding, all should be pretty straight forward.
Welding Stainless Steel is not vastly different to welding Mild Steel, which is why I say it’s no big deal, however, there are a couple of things worth noting.
- Stainless Steel doesn’t conduct heat as quickly as Mild Steel, so you normally need a little less power.
- Stainless Steel is more prone to distortion.
Types of Stainless Steel
I could write a book on all the different types of Stainless Steel, but for the purposes of this article I’ll stick with just the main two Austinetic Stainless Steels that most of us are likely to encounter.
- 304/304L - This is the most common “general purpose” Stainless Steel and is welded with one of the 308 spec Welding Rods or Wires.
- 316/316L - This grade is most commonly found in food related applications, industrial kitchen equipment for example and is welded with one of the 316 spec Welding Rods or Wires.
Types of Welding Rod or Wire
The general rule with Welding Stainless Steel is to weld it with either the same grade of Welding Rod, Tig Wire or Mig Wire, or a higher grade. So you could weld 304 Stainless Steel with a 308 or 316 Rod/Wire, but you shouldn’t weld 316 with a 308 Rod/Wire.
308 and 316 grades of Welding Rod/Wire are often modified from the basic alloy. These modifications are indicated in the basic spec number, for example, the most common is 308L & 316L, the “L” denotes Low Carbon. A lot of Mig and Tig Wire may be 308LSi & 316LSi, this denotes Low Carbon and added Silicon. Adding Silicon will make the molten weld metal slightly more fluid and so flow better.
Processes for Welding Stainless Steel
Stainless Steel can be welded with a Tig Welder, Mig Welder, or Stick Welder so lets look at the pros & cons of each.
- Tig Welding - This is the slowest process for welding Stainless steel, however, in the right hands, it will produce the nicest looking welds and because of its superior control, distortion can be better mitigated. Stainless Steel is Tig Welded with a Direct Current (DC) output.
Pro = Control/Quality
Con = Slow - Mig Welding - This is the fastest and, arguably, the easiest process for welding Stainless Steel and is ideal for production environments. Welds are unlikely to be works of art, but if that’s not important, Mig is a good option for most operators.
Pro = Fast and no harder than Mig Welding Mild Steel, no machine modification is needed, just a reel of Stainless Steel Wire and Argon/Co2 Gas.
Con = Not good for decorative welds. Limited control of distortion. - Stick Welding - welding Stainless Steel with a stick welder is as straightforward as Mild Steel; if anything, slightly easier, as the rods tend to run with a nice soft, smooth arc. Only thing to watch out for is the slag! This tends to fly off on its own and has a nasty habit of getting in your eyes. This is VERY painful (I speak from bitter experience 🙂 keep an auto helmet down, or wear safety glasses until ALL slag is removed.
Pro = No harder than stick welding Mild Steel
Con = Not as good as Tig for decorative welds and potentially dangerous slag removal.
I hope you found this useful, if things work out well for you, please feel free to post some pictures of your achievements on our Facebook Page
Please let me know what you thought of this article by leaving a comment. Don’t worry, your email address won’t be added to a database or shared and you won’t receive any unsolicited email.
Cheers
Graham
Welding Aluminium with Mig
Firstly, Mig Welding Aluminium with a general purpose Mig Welder is not ideal, a DIY type machine is even less suitable.
The best type of machine to weld Aluminium with is an AC/DC Tig Welder
Having said that, with the right set up, most Mig Welders can be used for welding aluminium (more or less), provided they’re set up correctly.
The challenges of Mig Welding Aluminium
Mig Welding steel is not difficult, this is because when it comes to setting the machine up:
> Roller Tension
> Torch Liner Quality
> Power Setting
> Wire Feed Speed
there is a reasonable margin of error.
For example, if your wire feed speed is a little High, or Low, you’ll get away with it. If you’re trying to weld Aluminium you WON’T get away with it. Wire feed speed that’s too low will cause the wire to burn back on to the Tip, too high and it will hit the job, potentially causing a “Birds Nest” of wire inside the machine! All very frustrating.
For Mig Welding Aluminium, you will need:
> Pure Argon Gas, NOT Co2 or an Argon/Co2 mix
> Plastic or Teflon Liner in your Torch (more on this later)
> An oversize Tip for the end of the Torch (more on this later)
> A Reel of Aluminium Wire suitable for the grade of Aluminium you intend welding
> LOTS of patience getting the Power and Wire Feed Speed right
Mig Torch Liner for Mig Welding Aluminium
A Regular steel liner (looks like bicycle brake cable), will scrape the surface of the Aluminium Welding Wire, causing the wire to bind/jam in the liner. A Plastic or Teflon Liner MUST be used to avoid this. If your Mig Torch already has a plastic liner, but you’ve been using it to weld steel, I would recommend fitting a new liner for Mig Welding Aluminium.
Oversized Mig Tip
Because Aluminium has binding properties, it may jam in a regular tip, especially when the tip gets hot. Some types of tip can be purchased in an “Aluminium” version, these are slightly oversized to compensate. If your machine’s tip type is not available in an Aluminium version, I would suggest using 1.0mm tip for 0.8mm wire.
Aluminium Mig Welding Wire
Several grades of Aluminium Mig Welding Wire are available and the grade selected needs to be compatible with the Aluminium to be welded.
If your welding a straightforward commercial grade of Aluminium, my suggestion would be to use a 5356 grade Aluminium Mig Wire You can use a 4043 grade, but this is a softer wire and therefore more prone to feed problems.
Setting up for Mig Welding Aluminium
OK, you’ve got Argon Gas, you’ve fitted a Plastic/Teflon Liner and oversized tip and you’ve fitted your spool of 5356 Welding Wire.
Next you’ll need to place close attention to the tension on your feed rollers. Ideally, you’ll be using ‘U’ shaped rollers, but if all that’s available for your machine is ‘V’ shape, these will have to suffice. Set the Roller Tension AS LOW AS POSSIBLE. Do this by starting at a point where the rollers slip and don’t feed the wire. Then slowly increase until the wire does feed OK. More info on Roller tension can be found in our Knowledge Zone
Power Setting
This will be determined by the job. If you’re an experienced welder of steel, start by setting the Power about 50% higher than you would for the same thickness of steel.
Wire Feed Speed
This will be determined by the job. If you’re an experienced welder of steel, start by setting the Wire Feed Speed about 100% higher than you would for the same thickness of steel.
Ambient temperature
If you’re doing a job in cold weather, try warming the job up a little. What you’re looking for is the job to not be cold to the touch, so if it is, put a fan heater on it for a few minutes. A job that’s warm to the touch will weld easier. This shouldn’t be necessary in Summer.
Getting Started - Patience Patience Patience
Make sure metal you intend welding is clean, running a sanding disc over the area to be welded can also help if the aluminium is old as this will reduce the effects of surface oxide.
Getting the balance of Power and Wire Feed Speed when trying to Mig Weld Aluminium is a frustrating exercise of trial and error.
Start by angling the torch at 45⁰ as this will minimise the risk of birds nesting wire inside the machine if the wire feed speed is too high.
Once you’ve got the Power and Wire Feed Speed set correctly the process is not dissimilar to welding steel. Hold the torch at around 70⁰, and move slowly along.
I hope you found this useful, if things work out well for you, please feel free to post some pictures of your achievements on our Facebook Page
Please let me know what you thought of this article by leaving a comment. Don’t worry, your email address won’t be added to a database or shared and you won’t receive any unsolicited email.
Cheers
Graham
Are Automatic Welding Helmets Safe?
Are Automatic Welding helmets Safe? Your Eyes are, arguably, your most vulnerable and most important sense, so it’s important to look after them.
What’s the Hazard?
Arc Welding processes (Tig Welding, Mig Welding, Stick Welding, Plasma Cutting etc) emit a range of light wave lengths that are hazardous to eyes, including Ultra Violet (UV), which is the most dangerous to eyes.
“Arc Eye” is a common and painful hazard for Welders. Arc Eye is essentially the UV Burning of the back of the eye. This is exactly the same as Sunburn to the skin. A mild Arc Eye feels like sand in the eyes, severe Arc Eye is extremely painful and can lead to temporary, or even permanent blindness. Arc Eye also increases the risk of cancer in the eye.
Solutions
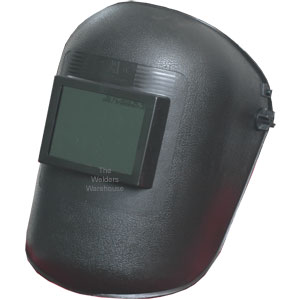
Traditional passive welding masks used a piece of shaded glass to reduce UV exposure. The darkness of this glass is typically 9EV to 13EV (13 being the darker). Maskss fitted with this glass are great for protecting the eyes from UV, but they’re so dark that the operator can see nothing until an arc is struck.
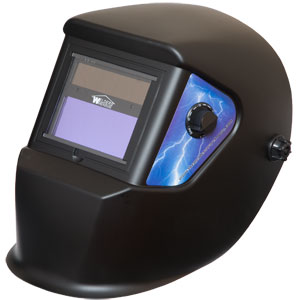
In the early 1990’s automatic welding masks came on to the market. These helmets are a bit like super fast, super dark, React to Light Sun Glasses.
When you’re not welding, the filter is a light green, allowing good vision for job set up and torch positioning. As soon as an arc is struck, the filter darkens to a welding shade. The welding shade can normally be adjusted, lighter, or darker.
When welding is finished, the helmet goes back to the Light Mode. This all happens VERY quickly! For example, our Speedshield V goes Dark in less than 1/10,000 of a second and comes back to Light Mode in between 0.2 and 1.0 second (user adjustable).
A question we get asked regularly is:
“Are Automatic Welding Helmets Safe, what happens if the mask does NOT darken when I strike an arc?”.
Well that’s where it gets a bit clever. All The Welders Warehouse Auto Welding Masks have a special coating that filters out UV to the equivalent of at least shade 15 glass. This coating is permanent, meaning you get shade 15+ protection from UV, even when the mask is in the Light Mode.
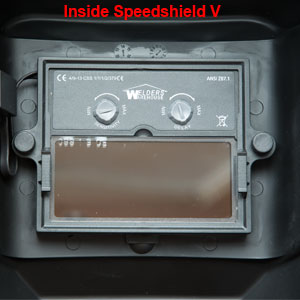
All this means that, provided you have the helmet down, there is ZERO risk of Arc Eye. The lightening and darkening of the Lens also means you don’t have to lift the helmet between welds or tacks to see where the next weld/tack needs to go, very convenient and great for productivity!
Are Automatic Welding Helmets Safe?
If you buy from a reputable supplier YES very safe!
Automatic Welding Masks are also easy to use, hugely convenient and productive.
You can see our full range of super safe, fully CE approved Auto Welding Masks on our website.
I hope you found this useful, please feel free to post some pictures of your achievements on our Facebook Page
Please let me know what you thought of this article by leaving a comment. Don’t worry, your email address won’t be added to a database or shared and you won’t receive any unsolicited email.
Cheers
Graham
How to Adjust Mig Welder Wire Feed Roller Tension
What is Roller Tension?
Mig Welder Wire Feed Roller Tension is how tightly the Rollers Grip the Mig Welding Wire to feed through the Mig Welders feed mechanism and torch. Feed Roller Tension is one of the more important mig welder settings.
If you’re more of a watcher than a reader, I’ve produced a video showing how to adjust Mig Welder Wire Feed Roller Tension, you can find this in the Mig Welder Info section of our Knowledge Zone
Too Little Roller Tension
If the tension is too light the rollers can slip and wire will not be fed through at the correct speed, or will feed erratically, potentially causing the wire to burn back on to the copper Tip at the end of the Mig Welders Torch.
Too Greater Roller Tension
If the tension is too great, unnecessary strain is put on the Mig Welders Wire Feed Motor and there is a risk of damaging the surface of the Mig Welding Wire. If the surface of the wire is damaged, this can in turn damage the Mig Welder Torch Liner.
If the Mig Welder Wire Feed Roller Tension is too great on softer Mig Wires (e.g. Flux Cored & Aluminium), the wire can be slightly flattened, so instead of your welding wire being, say 1.0mm in diameter, it may become 1.1 x 0.9mm, this will then increase the risk of jamming at the copper Tip.
To Correctly Adjust the Tension
So how do your correctly adjust Mig Welder Wire Feed Roller Tension? Here’s the method that’s served me well with Home and Professional welders for the last 20+ Years:
- Ensure the Mig Welders Torch is COLD
- Feed out about 50mm of welding wire
- Reduce the roller tension until you can press the torch trigger and the rollers slip (wire does not feed)
- Grip the wire between your thumb and first finger. Your grip should be firm but not tight (no white knuckles please)
- Turn the tension adjuster ½ a turn
- While gripping the wire as described in 4, press the torch trigger, if the rollers still slip turn the adjuster another ½ turn and repeat
- What you want is to just about be able to stop the wire feed through your fingers, but without gripping hard!
Conclusion
Prevention is always batter than cure, but if you’ve already experienced the feed problems mentioned earlier, chances are you’re going to need to replace your liner. This is something you should do from time to time anyway as torch liners are a consumable. We carry a range of Mig Torch Spares and our website has a useful Torch Identifier to help you select the correct parts for your Mig Gun.
I hope you found this useful, if things work out well for you, please feel free to post some pictures of your achievements on our Facebook Page
Please let me know what you thought of this article by leaving a comment. Don’t worry, your email address won’t be added to a database or shared and you won’t receive any unsolicited email.
Cheers
Graham
Mig Welding Gas
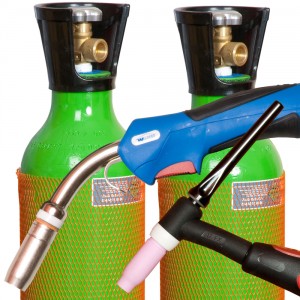
Mig Welding Gas is required because it’s essential to keep Oxygen from the weld pool. Shielding gas does this by replacing the Oxygen containing air that’s all around the weld pool.
Categories of Mig Welding Gas
Mig Welding Gas falls into two basic categories, “Inert” & “Active”.
Inert means the gas has no effect on the welding process.
Active means the gas has some effect on the welding process(more on this later!)
Types of Inert and Active Mig Welding Gas
The most commonly used Inert gas is Argon. Argon is the main shielding gas used for Tig Welding and for Mig Welding Aluminium or Mig Brazing.
The most commonly used Active Mig Welding Gas is a mixture of Argon and Co2, although Pure Co2 is also still used. Active gases are used for Mig Welding most metals (except Aluminium and Mig Brazing, where pure Argon is used).
Co2 is the lowest cost of the Active Gases, but is far from the best. Co2 produces a cooler, coarser, more spattery arc and a marginally harder weld. Co2 is a more challenging gas to use on thin material and not all Mig Welders perform well with 100% Co2 as a shielding gas!
An Argon/Co2 mix produces superior results as the arc is softer and smoother with the resulting weld deposit slightly softer and more malleable than where pure Co2 is used.There are several different mixes of Argon/Co2 on the market, typically:
95% Argon + 5% Co2, which is ideal for Mig Welding up to around 10mm Steel
90% Argon + 10% Co2, which is ideal for Mig Welding 8-25mm Steel
80% Argon + 20% Co2, which is ideal for Mig Welding 20mm plus Steel
What Inert and Active Mig Welding Gas Does
An Inert gas, such as Argon, has no effect, or reaction, on or with the welding process, it simply performs the essential task of replacing Air/Oxygen from around the weld pool.
Active gases do have an effect on the welding process. The effect of an active gas on Mig Welding is twofold:
Firstly, the Co2 content in an Argon/Co2 mix makes the gas slightly electrically conductive, this in turn raises the arc voltage, which increases penetration.
The second effect is the Co2 content breaks down the surface tension of the molten weld pool (this is the same type of surface tension that allows water to form a drip). Using Co2 to break the surface tension of the molten weld pool allows the weld to flow and flatten slightly for the correct weld profile.
If an Inert gas is used for Mig Welding (except Aluminium and Mig Braze), higher machine power output will be needed to achieve penetration and the finished weld will look too tall because the surface tension has not been broken.
Mig Welding & MAG Welding
The use of Active Gases for most Mig Welding applications means that most operators are actually MAG welding (Metal Active Gas) rather than MIG (Metal Inert Gas) welding, however, MIG has become the generic term, despite, in fact, being inaccurate
Mig Welding Gas Cylinders
Mig Welding Gas Cylinders in the UK can be obtained in three ways:
- Disposable Cylinders which are low cost to start out with and highly portable
- Deposit based Refillable Cylinders are more expensive to initially acquire as a deposit is required, but cheaper over the longer term as the gas fills are cheaper than using disposable cylinders.
- Rental Refillable Cylinders - here the cylinder is rented from the gas company, so there’s no deposit to pay. Ongoing gas fills are usually cheaper, but overall, cylinder rental is only cheaper for higher volume gas users where the lower gas fill cost compensates for the ongoing cylinder rental cost.
I hope you found this useful, if things work out well for you, please feel free to post some pictures of your achievements on our Facebook Page
You might also find my article Gas Flow Rate for Mig useful.
Please let me know what you thought of this article by leaving a comment. Don’t worry, your email address won’t be added to a database or shared and you won’t receive any unsolicited email.
Cheers
Graham
Oxy Acetylene Kits
Oxy Acetylene Kits are one of the oldest types of equipment for welding, but they can do so much more!
But before we talk about that!
What’s important
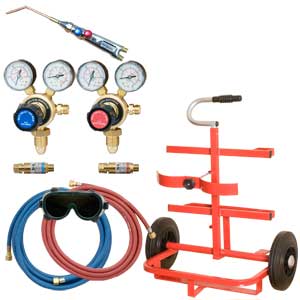
- Safety - Oxygen and Acetylene Kits can be dangerous as both gases dangerous. So it’s critically important that good quality equipment is used, kept in good condition, and inspected/tested at least once a Year.
- Choose the right Kit for your application. If you buy a kit with a Lightweight Torch when you want to do heavy stuff, you’re going to be disappointed. Similarly, if you buy a kit with a Heavy Duty Torch and your application is small and requires a lot of torch manipulation, you’re going to find a Heavy Duty Torch cumbersome. So think about your work and consider the pros & cons. You might find this video useful.
- If you’re making up, or refurbishing your own kit from purchased parts, ensure you have Flash Arrestors (a legal requirement in the UK). Also ensure your hoses have Check Valves on the Torch end.
- When assembling an Oxy Acetylene Kit NEVER use thread sealing products. Also, DO NOT over tighten fittings, seals are made either by an ‘O’ Ring or a Brass on Brass seal which can be damaged by over tightening.
- Ensure your Kit is assembled correctly.
- Ensure you operate your Oxy Acetylene Kit correctly, especially regarding Regulator operation and pressures along with lighting and shutting down the Torch.
View our range of Oxy Acetylene Kits
Uses for Oxy Acetylene Kits
As I indicated at the top, Oxy Acetylene Kits are extremely versatile and have many uses, in my opinion, it’s the most versatile of the Welding processes.
Oxy Acetylene Welding

Oxygen + Acetylene is the only readily available gas combination that can be realistically used for fusion welding and is the main reason engineers buy an Oxy Acetylene Kit.
View our Range of Oxy Acetylene Welding Torches
Brazing/Silver Soldering
With a good quality Torch, Oxygen + Acetylene produces a very precise, hot flame which can be applied very accurately, making it ideal for Braze and Silver Solder applications.
Oxy Acetylene Cutting
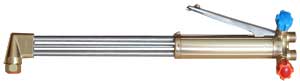
A high temperature flame offers fast heating to cutting temperature.
View our 18/90 Oxy Acetylene Cutting Gun
Heating

Using a Nozzle with multiple jets results in fast, accurate heating, whatever the application.
Conclusion
With all this versatility it’s no wonder an Oxy Acetylene Kit can be found in almost every professional workshop, whatever the trade.
Need to Know More?
If you would like to know more, or would like to discuss what equipment might best suit your needs, please don’t hesitate to get in touch, you can write via our Contact Us page, or phone and ask for me! (numbers at the top of this page)
I hope you found this useful, if things work out well for you, please feel free to post some pictures of your achievements on our Facebook Page
Please let me know what you thought of this article by leaving a comment. Don’t worry, your email address won’t be added to a database or shared and you won’t receive any unsolicited email.
Cheers
Graham
We accept the following methods of payment

